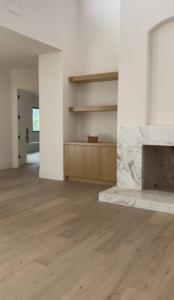
A Step-by-Step Guide to Applying Smooth Stucco on Your Home

Stucco has long been admired for its timeless appeal and durability as a building material. It’s not just functional; it’s also a versatile canvas for architectural beauty. If you’re considering adding a touch of elegance and texture to your home’s exterior or interior, a smooth stucco finish might be the perfect choice. In this step-by-step guide, we will walk you through the process of applying smooth stucco to your home, helping you achieve a flawless and enduring finish.

stucco wallsstucco wallsstucco wallsstucco walls

Step 1: Gather Your Materials

Before you embark on your stucco journey, make sure you have all the necessary tools and materials, including:

  • Stucco Mix (pre-mixed or a combination of cement, sand, and lime)

  • Primer

  • Wire mesh or lath

  • Stucco Nails

  • Trowels (hawk and finishing trowel)

  • Bucket and mixing paddle

Step 2: Prepare the Surface

  • Ensure the surface you plan to stucco is clean and free from dirt, dust, and loose debris.

  • Repair any cracks or imperfections in the existing wall. Fill them with patching material and allow it to cure properly.

  • Apply a coat of primer to the surface to enhance adhesion.

Step 3: Install the Lath or Wire Mesh

  • If your wall is not already equipped with lath or wire mesh, attach it securely to the surface using stucco nails.

  • Leave a small gap at the bottom of the wall to allow moisture to escape.

Step 4: Mix and Apply the Scratch Coat

  • Mix the scratch coat stucco according to the manufacturer’s instructions. It should have a peanut butter-like consistency.

  • Dampen the surface with water before applying the scratch coat.

  • Apply the scratch coat in a 3/8-inch thick layer, embedding it into the lath or mesh.

  • Use horizontal and vertical strokes to create a textured surface.

  • Allow the scratch coat to cure for 48 hours.

Step 5: Apply the Brown Coat

  • Mix the brown coat stucco to the manufacturer’s specifications.

  • Dampen the scratch coat with water.

  • Apply the brown coat in a 3/8-inch thick layer, using a straight edge to level the surface.

  • For a smooth stucco finish, scrape the surface lightly with a finishing trowel while it’s still wet.

  • Allow the brown coat to cure for several days, keeping it moist during the curing process.

Step 6: Apply the Finish Coat

  • Mix the finish coat stucco to the desired texture and color.

  • Dampen the brown coat with water before applying the finish coat.

  • Apply the finish coat in a 1/8-inch thick layer, working in small sections.

  • Use a hawk and finishing trowel to achieve the smooth texture you desire.

  • Let the finish coat set for a few hours before using a sponge or damp cloth to create a final smooth surface.

Step 7: Curing and Maintenance

  • Keep the stucco surface moist for several days after application to aid in proper curing.

  • Regularly inspect and maintain the stucco finish, repairing any cracks for imperfections promptly.

Applying smooth stucco to your home can be a rewarding DIY project, provided you follow these step-by-step instructions carefully. With patience, attention to detail, and the right materials, you can achieve a flawless and enduring stucco finish that enhances the aesthetic and value of your home. So, roll up your sleeves and embark on the journey of transforming your living space with the timeless beauty of smooth stucco.